
In the second class with Angela Walters, we tackled borders and backgrounds. Angela also offers this as a Craftsy class. We started with a wavy line design that could be used as is or could be modified to add more interest, for example, a ribbon candy or wishbone filler.
Most everyone can quilt a wavy line. If you can’t, draw a straight line and it will probably turn out wavy.

Wavy border with filler variations.
In addition to the variations to the pattern itself, Angela also demonstrated how to tackle the corner in a border design, either by changing the scale, changing the angle, or using a different design altogether in the corner. On the point of scale, this design (like most border designs) can be used as an overall filler through a change of scale.

Wavy lines with no filler at the top, and filled in with a wishbone below.
I just spent ten minutes talking about a wavy line. It’s a skill.
Confession: I didn’t love this pattern, but as Angela pointed out in the Shape-by-Shape class, if you have a design that isn’t working, think what to change to make it work. So having thought about it, this shape could work really well with a curved, cathedral-shaped line, or with a curved, pointy line. I played around with such variations when I attended this class the second time.

Making the pattern work for me.
The next design was a wavy filler, a fairly straightforward design using a curvy line. You start by drawing a curvy line across the quilt, followed by a curvy line in the other direction that meets up with the first line at some point and then turns back. You continue to draw these wavy lines to meet up and go back at various points. The overall effect is very pretty and a multitude of lines hides a multitude of sins.

Wavy lines
As a variation, the curvy lines can be used to create slightly larger “pods,” which can then be filled with a secondary pattern such as ribbon candy or pebbles. Another variation is to introduce a wood-grain pattern here and there.

This is a slight variation on the pattern, but illustrates the pods well.
Next, we tackled the swirl chain.
J’adore swirls.
The swirl chain is SUCH a versatile pattern. It can be used in a border or as a background, depending on scale and direction. The pattern starts out with an elongated, downward-facing swirl that is echoed a few times, and continues with an elongated, upward-facing swirl that is also echoed. The trick is to always finish the swirl echo in the “V” shape that forms between the opposite-facing swirls, and then to curve either over the upward-facing swirl or below the downward-facing swirl before starting the next swirl, to maintain a continuous line of quilting. When you reach a corner, the next swirl should go at a 90-degree angle from the last “V” to fit the next line.

LOVE THIS PATTERN
The V is where you need to be!
Referencing back to another point Angela made in the Shape-by-Shape class, rather than quilting the entire border and then filling in the quilt, which can lead to warping, it is best to quilt the border in the available throat space of the longarm, then to fill in the centre of the quilt, and only then to roll the quilt and to again do the borders and filler, and so on. When demonstrating swirl chain, she showed exactly how to “enter” the quilt from the border and how to return to the border – it’s always the V! End the swirl at a V facing towards the edge of the quilt, use the filler design (e.g., straight lines, small swirls, feathers, leaves, etc.) to fill in around the outer edge of the swirl design, return to the V where you started filling in, echo it to the opposite V, and then begin filling in the other side of the border. Since you’re facing the centre of the quilt while doing this, you can now start quilting the centre. This is illustrated in the sketch above.
The secret to this design is no secret: echo, echo, echo!
Angela showed us how the quilting around this pattern makes a very big difference in terms of how much the design stands out or blends in. By framing the swirls with tightly quilted parallel lines perpendicular to the swirls, the swirls pop right out. Quilt the lines more widely apart, at about the same scale as the echoes on the swirl, and suddenly the swirls don’t stand out so much. To really make the swirl chain blend in, surround it with smaller-scale swirls. The sample Angela brought with her demonstrated these differences beautifully—a tiny change makes a huge difference in how a quilting pattern can look!

See how the tight quilting at the bottom of the swirl chain totally makes it pop out, while the lines above make it blend in?
When using this design as a filler, the next elongated swirl can go any which way, but the trick is still to always end up in the V before heading out into the next swirl. You can also add a tear-drop shape in the V for a bit interest before continuing with the next swirl.
I’m working on a quilt right now where I’ve been playing with the swirl chain and it’s such a fun pattern.
The next border design was a herringbone design (you can see it in the picture above, in the blue section above the swirl chain). This design. is. gorgeous. It is subtle enough that doesn’t draw attention away from the centre of the quilt. To quilt it, quilt a rectangle in the border, then fill it with diagonal lines from the starting corner to the opposite corner. From there, leave a small gap and quilt the next rectangle, with the diagonal lines going in the other direction.

Swoon!
The rectangles can be narrow or wide, or can match the width of the blocks or the sashings in the quilt centre. The gap between the rectangles is optional, and the lines don’t have to be diagonal, though I find the diagonal lines quite striking. For example, you could fill the rectangles with straight lines, alternating between horizontal and vertical lines, or you could use a wishbone pattern to fill them in. If you leave a gap between the rectangle, you can fill it with vertical lines. The rectangles can also be of different widths to add a bit of interest.
There are a couple of ways to approach the corner. You can continue the rectangles to the edge of the quilt, and then when it’s time to go down the side of the quilt, simply change the direction. Alternatively, as you approach the corner, start reducing the width of the rectangles a little, making them slightly (but not noticeably) narrower, so that you reach the corner with your last rectangle aligning with the inner edge of the perpendicular border. From here, you can leave the corner unquilted and start with a new rectangle down the side of the border, or you can fill in the corner with a different design, or simply fill it in with a square rather than a rectangle.
On a quilt with equally sized blocks and sashing, use the quilting in the border to echo—or extend—the shape of the block. In the sketch below, the purple patterns represent the quiting that would extend the shape of the block into the border. I don’t have a good picture of this but it’s a technique Angela uses frequently.
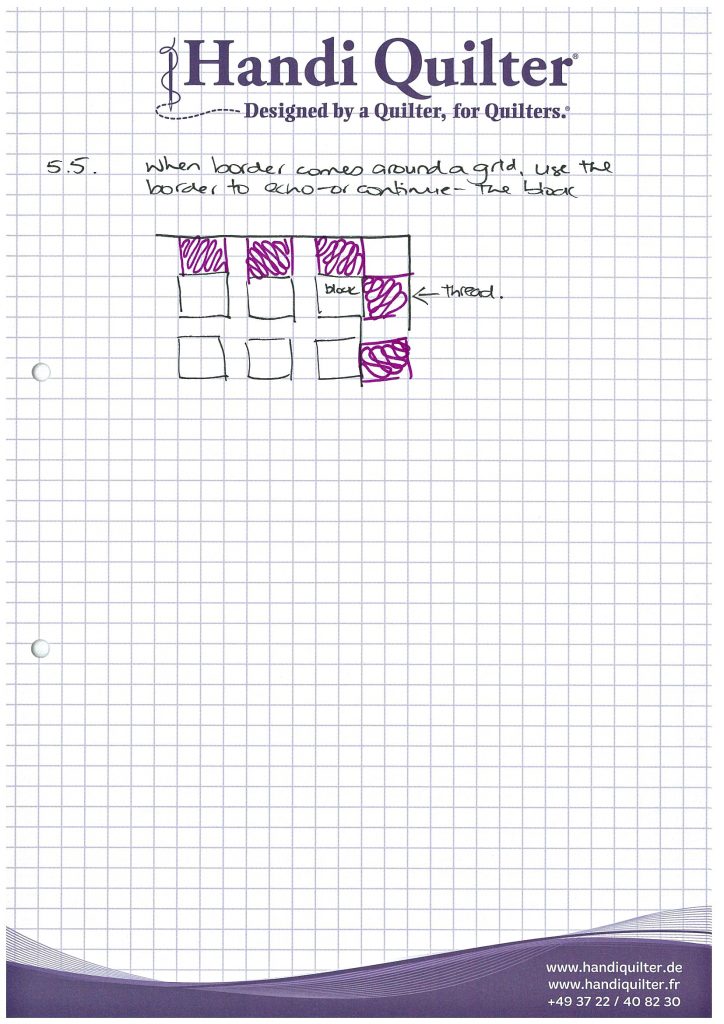
This sketch doesn’t really explain this well.
The next design was back-and-forth lines. A simple filler in which scale can make a big difference. To quilt it, start at the edge of the quilt with a straight line, an inch or two wide, and then curve back to echo it. As you approach the edge of the quilt, curve and echo again, this time making the line a little shorter or longer than the original line. Continue going back and forth and when you reach the bottom of the throat space, do the same quilting back up towards the top of the quilt, with the lines curving in the other direction just before they meet the original set of curves. Although this design requires quilting in columns up and down the quilt, varying the line lengths will eliminate the appearnce of actual columns.

Back-and-forth lines.
To make sure that you get a round edge of the curve, don’t wait to hit the turning point and then to turn the machine; rather, start the curve AS you approach the turning point.
For variations, you can change the scale of this pattern, by making the distance between the lines a little bigger. You can also use straight rather than curved edges.
To make any aspect of the quilt stand out—quilt small.
I don’t see myself using this pattern as an overall design, but I definitely see using it to make another design stand out, like the echo swirl, or like the bracket design from Shape-by-Shape, which I recently tried. It… needs practice, or at the very least, matching thread ;).
There is always a solution and it is never to rip out the quilting.
Amen.
The last pattern we tackled was a paisley feather filler. This one is fairly straightforward: Start with an elongated swirl, then quilt a paisley design around it that resembles a feather and echo it. This is another shape where scale makes a big difference. Quilt a big swirl and small paisley feathers, or keep the paisley feathers at the same scale.

I do this better with thread than with pen.
I love feathers. I think you should love them as much as I do.
Not sure I love them, but the paisley and the echoing make them a lot more palatable.
I really loved this class. In addition to learning some really interesting patterns, it showed me how scaling a pattern can make a huge difference to the overall look, and how easy it is to make a pattern pop out to make it a feature, or stay hidden to nicely complement the piecing. I’ve already used some of these patterns since the class and I’m really looking forward to trying the others out.
In the next post I’ll talk about the Little Changes, Big Variety class.
Don’t forget to sign up for my mailing list to make sure you don’t miss a post in this series. There might be a giveaway involved!